Change your own variation assignment
In short
As soon as an experiment is running, you are assigned to a variation like any other visitor. To see the original or a specific variation yourself, use „Force into variation“. You can also change the assignment by hand in your browser's session or local storage.
When you need this
Your automatic assignment decides what you see on the page. If you want to check a particular variation, or the original, on the live page, change the assignment instead of waiting for a new session or using a different browser.
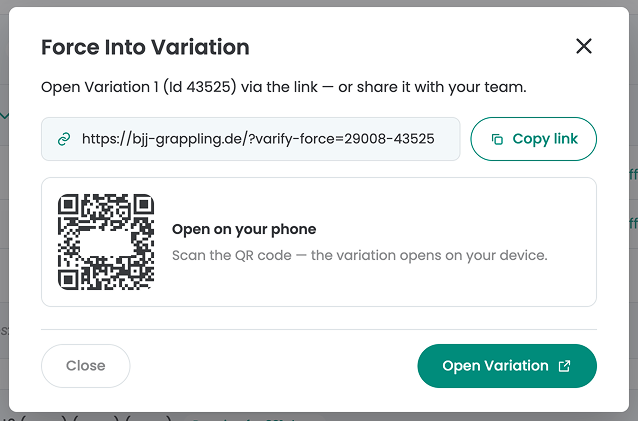
Use „Force into variation“ (recommended)
„Force into variation“ works only after the experiment has been started.
- Start the experiment.
- Click „Force into variation“.
- Click "Open Variation".
- You are reassigned and are now part of that variation.
Before the experiment is started, you cannot force a variation. To check variations before going live, use the QA mode described in Quality assurance.
Change the assignment in storage
If you prefer to change the assignment directly in the browser, edit the value Varify stores for the experiment in the session or local storage.
Step 1: Check your A/B testing setup
Varify stores the assignment either in the session storage or in the local storage. Which one it uses depends on what you chose in your A/B testing setup. Check this setting first, because you will need to open the same storage in your browser.
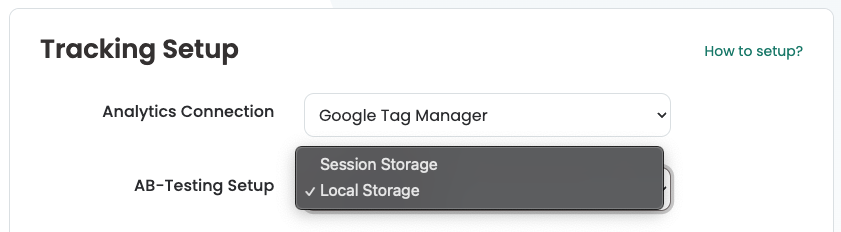
If your setup uses session storage, you are assigned to a variation again in every new browser session. Your manual assignment applies only to the current session.
Step 2: Open the storage
We recommend Chrome for these steps.
- Open the page where the experiment runs.
- Press F12, or right-click the page and select „Inspect“.
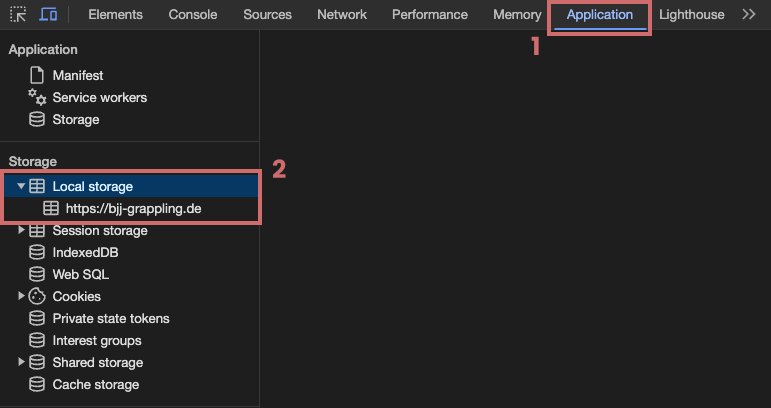
- Switch to the „Application“ tab. If you do not see it, click the „>>“ symbol to show more tabs.
- In the left-hand column, open „Session storage“ or „Local storage“, depending on your setup.
- Click the URL of your website below it.
Step 3: Find the experiment
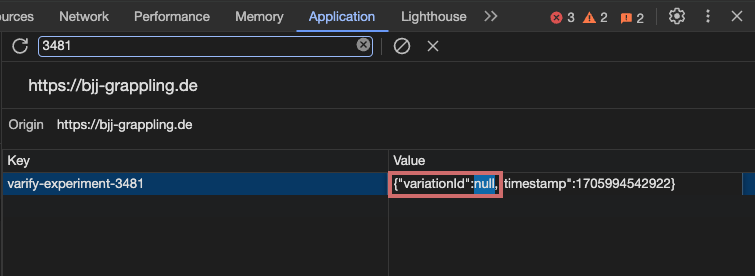
Enter the experiment ID in the filter field. The entry for the experiment has the key varify-experiment- followed by the experiment ID.
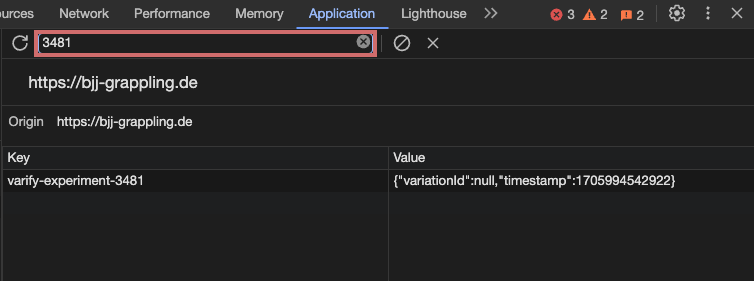
Step 4: Change the value
- Double-click the entry in the „Value“ column.
- Find the part
"variationId":and change the value after it:- Enter the variation ID of the variation you want to see.
- Enter null to return to the original.
- Press Enter to save.
- Reload the page. You now see the variation you assigned yourself to.