Tracking with Varify.io
In short
In „Tracking Setup“, you decide which web analytics tool evaluates your experiments. When you set up tracking for the first time, the Tracking Setup Wizard guides you step by step and suggests the options that fit your site.
You also come back here later to change your tracking settings, for example to switch to a different analytics tool or to activate an integration.
How does tracking work?
Tracking runs in three steps:
- A visitor is assigned to an experiment as a test participant.
- Varify creates an event with all relevant tracking parameters, for example the experiment ID and the variation.
- The event is sent to your web analytics tool, for example through Google Tag Manager or a direct integration.
By default, the delivery of the experiment and the tracking are separate. The visitor can already see the variation when the page loads. The matching tracking event is sent to the data layer later.
An Activate Tracking Script decides when the event is sent. It is usually placed in Google Tag Manager. Varify sends the tracking events to your web analytics tool only after this script fires, for example:
- after your tracking setup has fully initialized
- as soon as the visitor has given consent (see Send data to your web analytics tool only after user consent)
You can find more details in the article „How Varify.io works“.
How to set up tracking
- Click „Tracking Setup“ in the Varify menu.
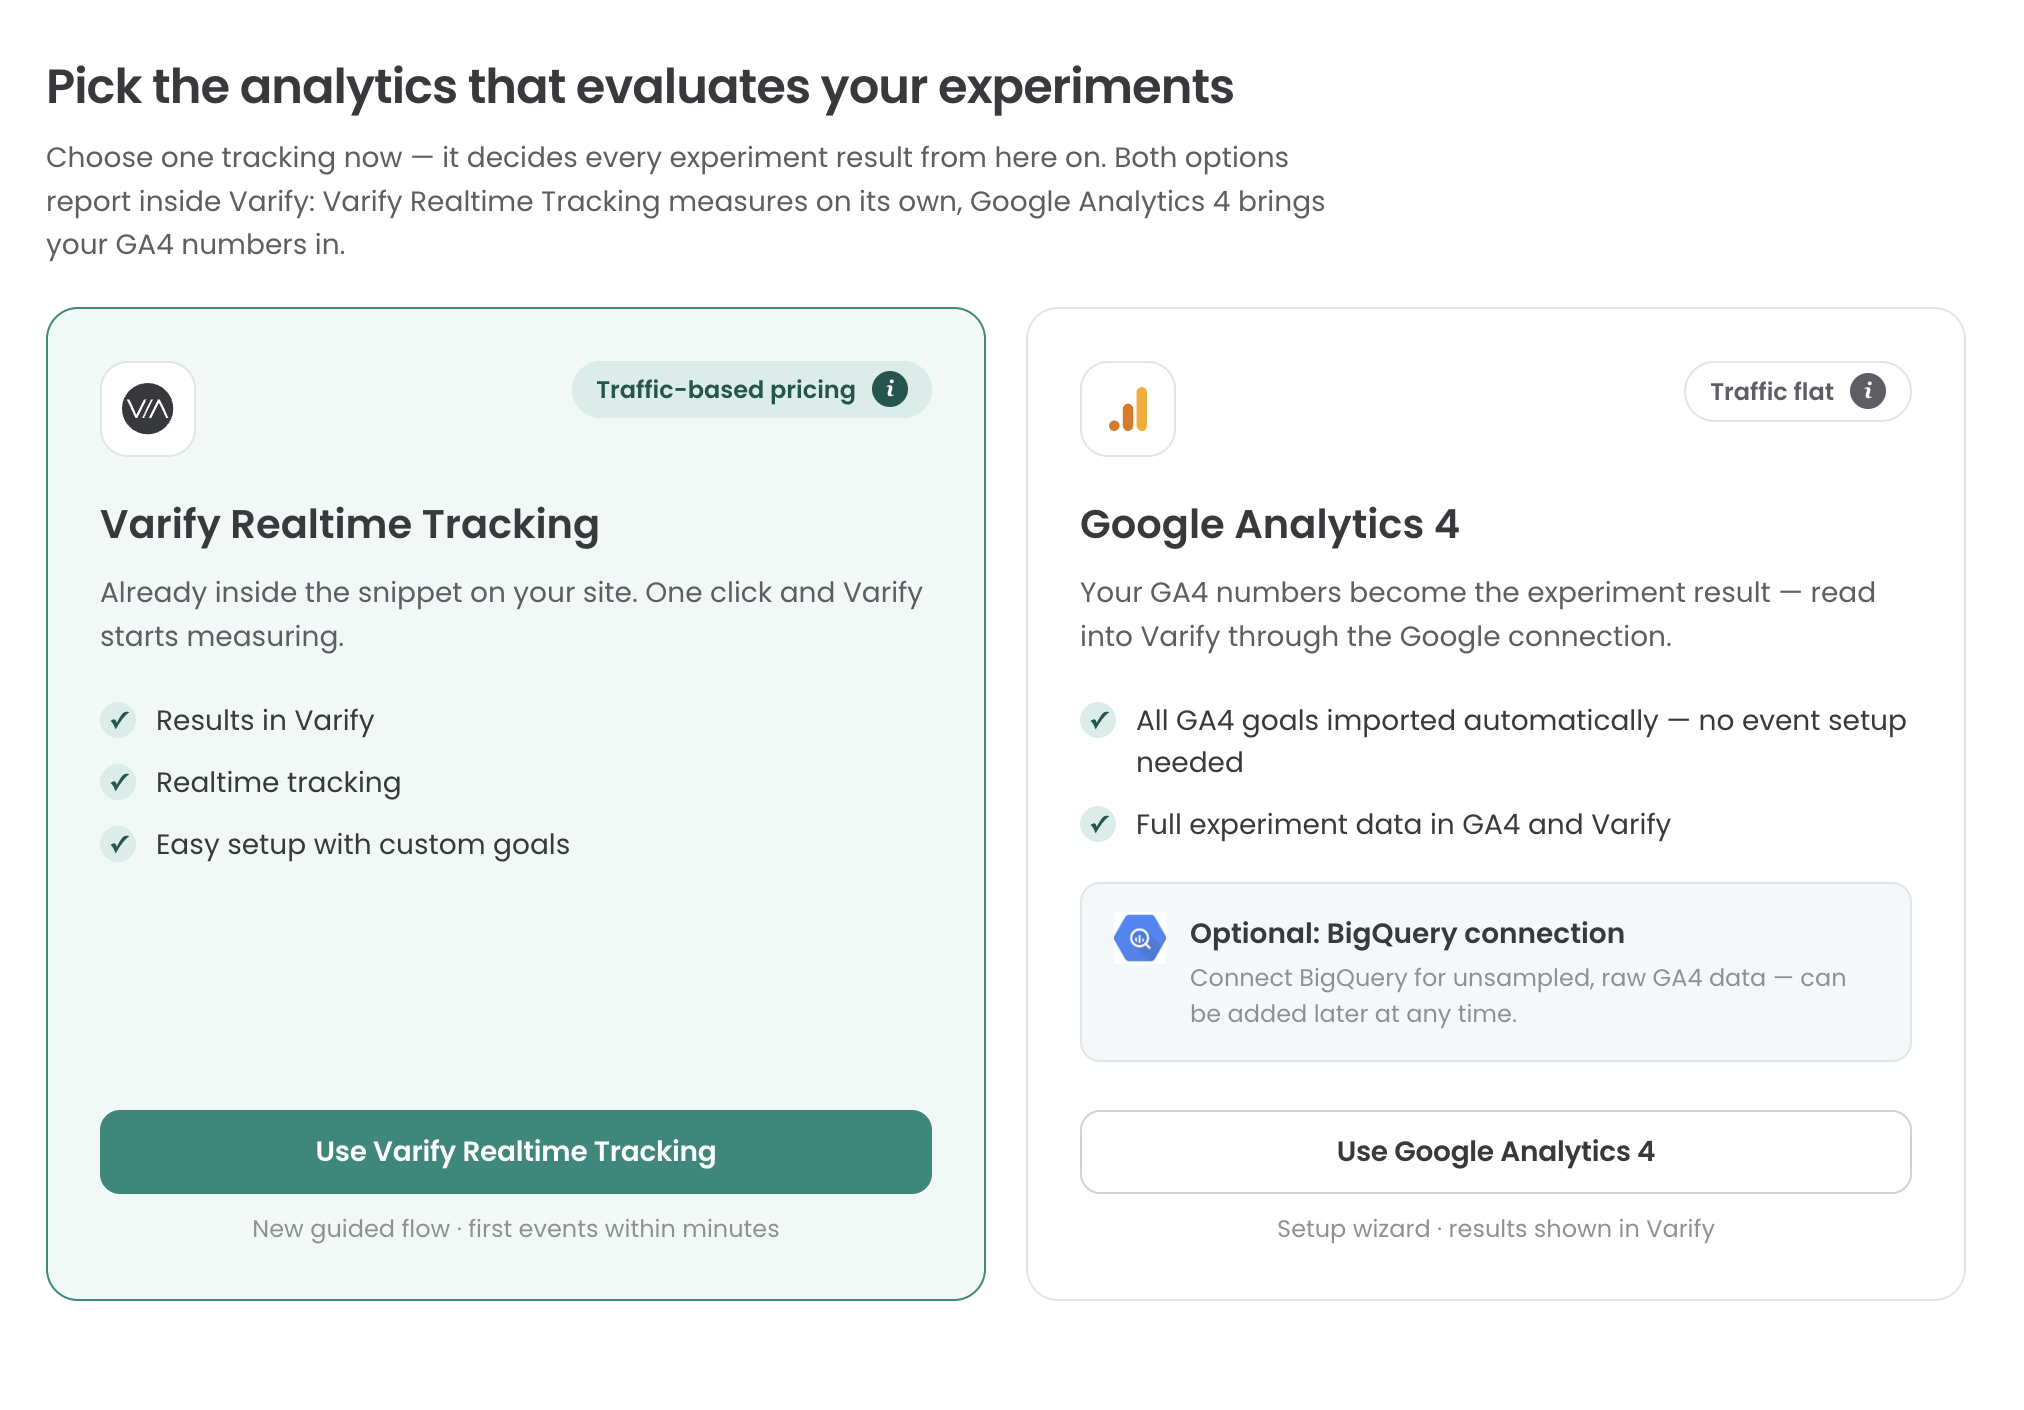
- Choose the analytics that evaluates your experiments:
- „Varify Realtime Tracking“: Varify measures your goals itself, and you see the results without delay. Details: Varify Realtime Tracking.
- „Google Analytics 4“: your existing GA4 property evaluates the experiments.
- Follow the wizard. It guides you through the rest of the setup step by step.
To evaluate with a web analytics tool other than GA4, for example PostHog, Matomo, Piwik Pro or etracker, select it under „Integrations“.
Important: Depending on the setup of your website and the integration of Google Tag Manager, not all tracking options are possible. The Tracking Setup Wizard will automatically suggest the appropriate options for your setup.
Google Analytics 4
Which Google Analytics 4 setup is right for me?
Various methods are available for tracking integration with GA4. (Automatic, manual, Shopify Custom Pixel)
Important for Shopify: If the Google Tag Manager is integrated via a Shopify Custom Pixel, the following tracking integration should be followed: Shopify Custom Pixel Integration via Google Tag Manager
If this is not the case, we recommend the automatic or manual tracking setup.
Automatic tracking setup
The auto setup is the easiest way to connect GA4 with Varify. A Google Tag Manager container created by Varify is automatically integrated into your page via the Varify script. This container ensures that all Varify events are reliably sent to your GA4 property.
If you have integrated the server-side Google Tag Manager or the Google Tag Manager via the Shopify Custom Pixel, please use the manual tracking setup.
Manual tracking setup
With this setup, you have full control over the setup. Here you set up all the necessary tags, triggers and variables independently in your Google Tag Manager.
Important: If you also use the server-side Google Tag Manager, the Varify events must also be passed on to GA4 in the server-side Google Tag Manager.
Do not use this integration if you have integrated Shopify via the Custom Pixel.
Connect Google Analytics 4 Property
When tracking with Google Analytics 4, you can visualize the results directly in Varify Reporting. To do this, a connection to the appropriate GA4 property must be established once in the tracking setup via a linked Google account. This Google account requires at least Editor rights in the GA4 property for the setup and configuration to work correctly.
Certain Google scopes are required for the connection with Google Analytics 4 and BigQuery so that the functions can be provided reliably and automatically. You can find an overview of the required scopes here.
Show required scopes
analytics.edit
Required to create and delete GA4 audiences programmatically and to create or manage BigQuery links as part of the automatic BigQuery setup.
analytics.readonly
Is required to run GA4 reports and read analytics data. This scope enables read-only access to analytics data.
bigquery
Required for automatic BigQuery setup, updating datasets and creating and executing BigQuery jobs. These jobs are used to calculate BigQuery reports and retrieve their results.
cloud platform
Is required for the BigQuery Auto Setup to create Google Cloud projects and activate the required Google services (e.g. BigQuery APIs) within these projects.
Shopify Custom Pixel Integration
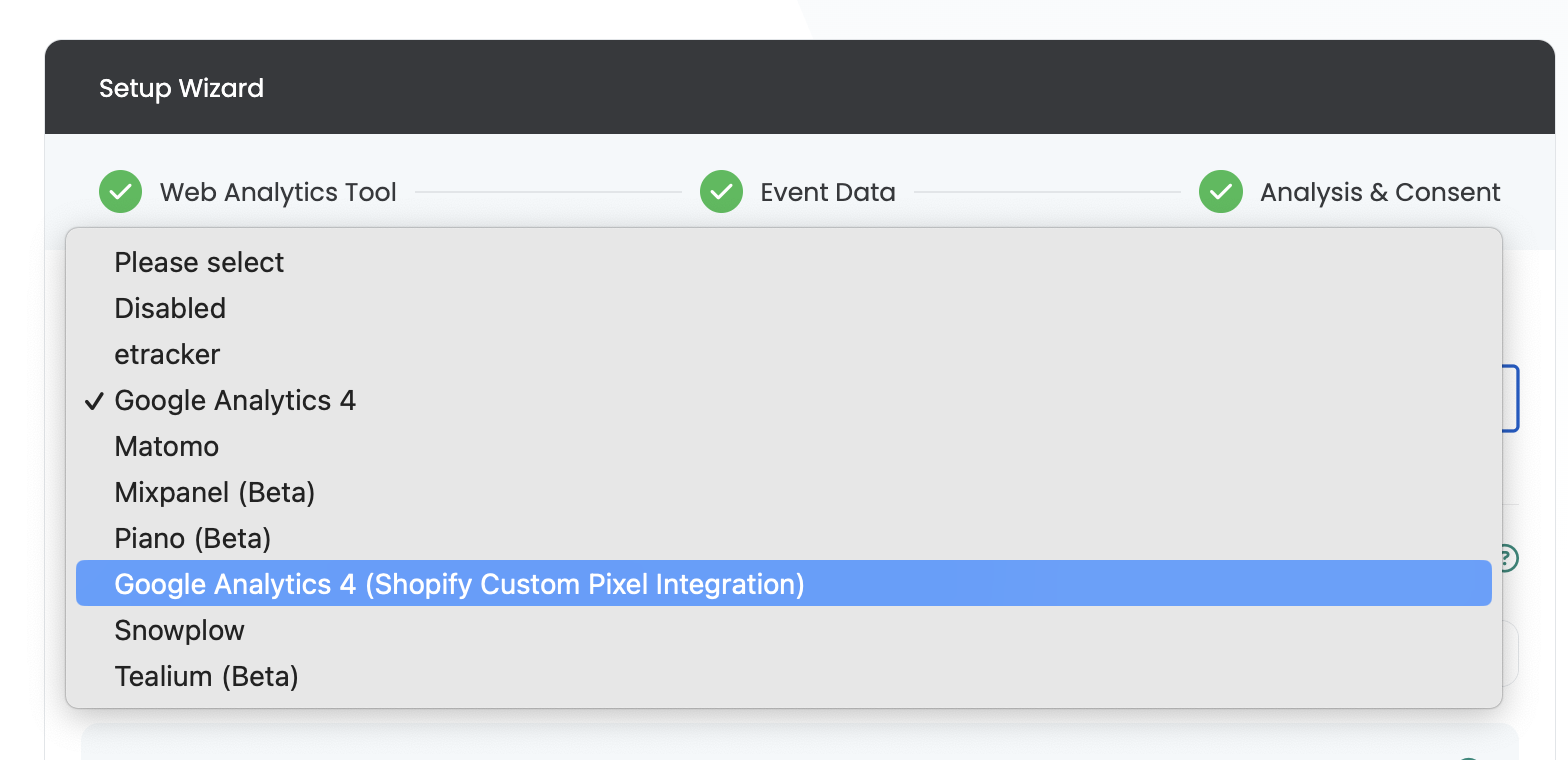
If you have integrated the Google Tag Manager on your site via the Shopify Custom Pixel, then select the option "Google Analytics 4 (Shopify Custom Pixel Integration)". This is important as the data is then not sent directly to the top level of your website, but is loaded in a separate iframe.
Other web analytics tools under „Integrations“
Shopify Conversion Data, PostHog, Matomo, Piwik Pro and etracker are set up as integrations. To evaluate your experiments with one of them, activate it under „Integrations“ in the tracking setup.
Shopify Conversion Data
Varify offers a special logic that allows you to evaluate your A/B test results directly on the basis of your Shopify figures. The experiment data is transmitted to Varify after the purchase and displayed in the report of the respective experiment.
Important: This Shopify tracking only works in combination with the Google Analytics 4 tracking setup. The prerequisite is therefore a correctly set up and functioning GA4 tracking with Varify.
PostHog Tracking
Evaluate your Varify experiments directly with PostHog data. Varify sends an event to PostHog. Accordingly, you can either evaluate your A/B tests directly in PostHog or directly in the report of your experiment directly in Varify.
Matomo
The Matomo setup allows you to easily collect and analyze Varify data. The Matomo Tag Manager is integrated into your website to automatically collect all relevant Varify events. You evaluate the A/B test results directly in Matomo.
Piwik Pro
With the help of a tag manager, you can send Varify events directly to Piwik to analyze your experiments. To do this, create the necessary variables, events and a tag to connect Varify with Piwik. You can then segment according to your variations in Piwik.
etracker
You can easily link etracker with Varify in two ways. Firstly, there is the "direct integration". Here you can make a tracking setting in Varify to send data directly to etracker.
Alternatively, you can also use a Tag Manager. With this method, you send tracking events directly to etracker via the Tag Manager.
Mixpanel, Piano, Snowplow, (Tealium) and other web analytics tools
If you use one of the web analytics tools mentioned, please contact support@varify.io and we will be happy to help you connect your web analytics tool with Varify.