Shopify - Test PDP Template
Table of contents
In short
With Varify, you can easily test alternative PDP templates for your Shopify store. To do this, first create a new PDP template with all the desired customizations. Create a new A/B test and add the JavaScript from this guide. No changes to products or Shopify settings are necessary.
Create new template
First create a new template for your product detail page (PDP). This allows you to test alternative arrangements, app widgets or other elements.
How to create a new template in just a few steps:
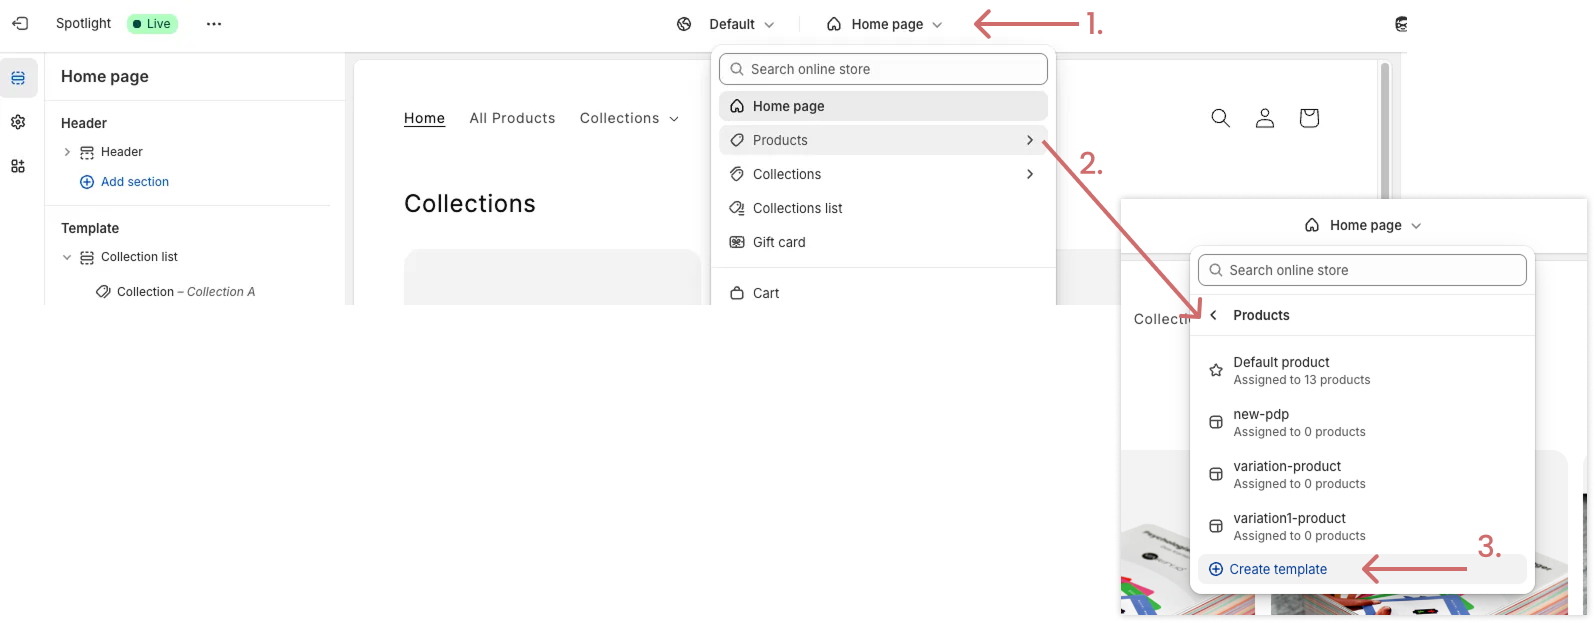
- Go to Online Store > Themes > Customize
- Click on the drop-down menu at the top, which is set to "Home page" by default
- Select the Products area in the dropdown
- Click on Create Template to create your new PDP template
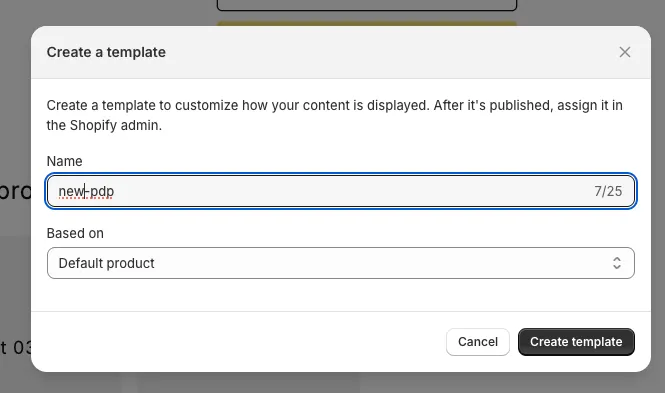
- Give the new template a name, such as: new-pdp.
- Under „Based on,“ select the template you’re currently using—it will serve as the starting point for your new template.
- Now make all the desired changes to the new template:
- Test widgets of a Shopify app
- Create new blocks, elements or texts
- Change the order of existing blocks
- Customize the color scheme
- and much more
- Then save the new version of your PDP template. It is not yet visible as your products are still set to the original template.
Create a new experiment in Varify
- Create a new experiment on one of your product pages
- Click on the code symbol at the top right
- Select "Add JavaScript"
- Insert the following JavaScript
- In line 5, change the value of the constant pdpVariationName 'new-pdp' and replace it with the name of your new template
- In lines 3 and 4, change the experiment and variant IDs to the IDs of the experiment accordingly. (Important: You must save the test once beforehand so that the IDs are created at all. You can then save it via Edit again and replace the IDs).
- Save the experiment
`
(function () {
  // ─── CONFIG ───
  const experimentId = 32898;
  const variationId = 49279;
  const viewValue = 'new-pdp'; //"view"-value (z.B. Template-Name)

  // ─── HELPERS ───
  if (window.varify.helpers.isInEditor()) {
    return
  }

  // ─── LOGIC ───
  const params = new URLSearchParams(window.location.search);
  const paramAsBase64 = btoa(`${experimentId}:${variationId}`).replace(/=/g, '');

  const needsView = params.get('view') !== String(viewValue);
  const needsVa = params.get('va-red') !== paramAsBase64;

  if (needsView || needsVa) {
    params.set('view', String(viewValue));
    params.set('va-red', paramAsBase64);

    const newUrl =
      `${window.location.origin}${window.location.pathname}?${params.toString()}${window.location.hash || ''}`;

    window.location.href = newUrl;
  }
})();
`
Configure and start experiment targeting
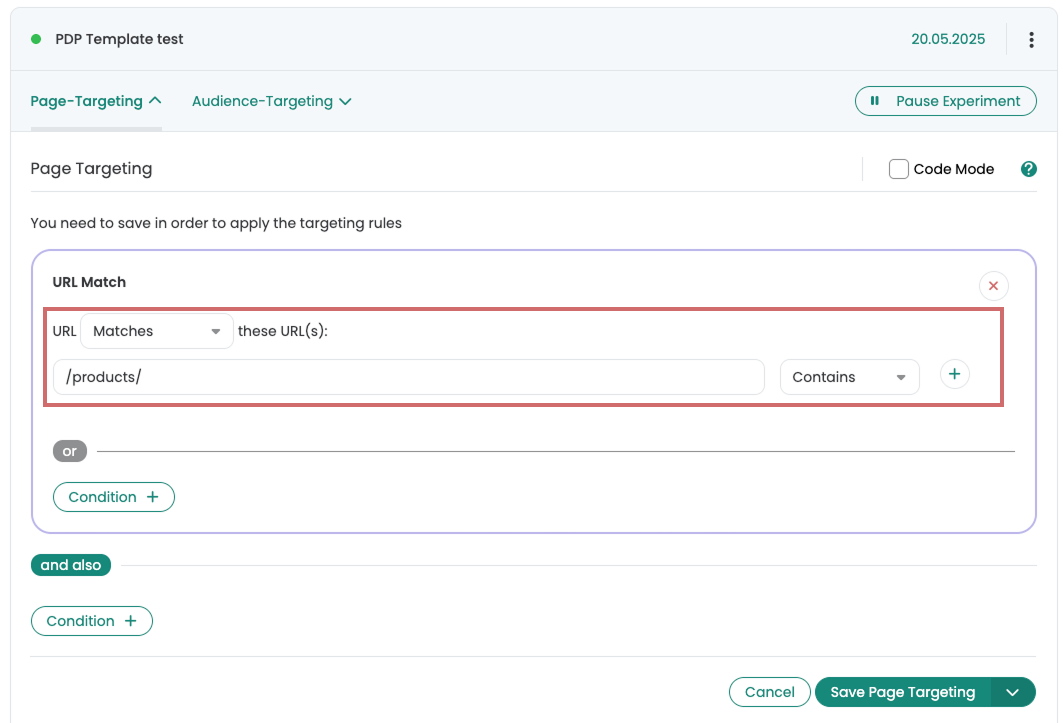
The experiment should be displayed on all product pages. Therefore, a small adjustment in page targeting is necessary.
- Open the page targeting of the experiment
- Set the targeting to /products/ with the matching type "Contains"
- If your product detail pages are not clearly identifiable via the URL, you can also use a unique CSS selector that only appears on your PDPs. The "Buybox" selector is usually suitable for this.
- Start the experiment